Introduction
If your website needs a modern update, then you need to start with your images. While you may think of your website as something static, it’s actually a living document that needs to reflect the current state of your business. In order to update your images without having to do a complete overhaul, use 5120x1440p 329 San Francisco Images. These high-resolution images will help you showcase your products in the best possible light and make sure that your website looks its best at all times.
What is 5120x1440p?
5120x1440p is a resolution commonly used on monitors, televisions and computer screens. At this resolution, there are 3,840 pixels on the horizontal axis and 2,160 on the vertical axis.
What is a 329 San Francisco image?
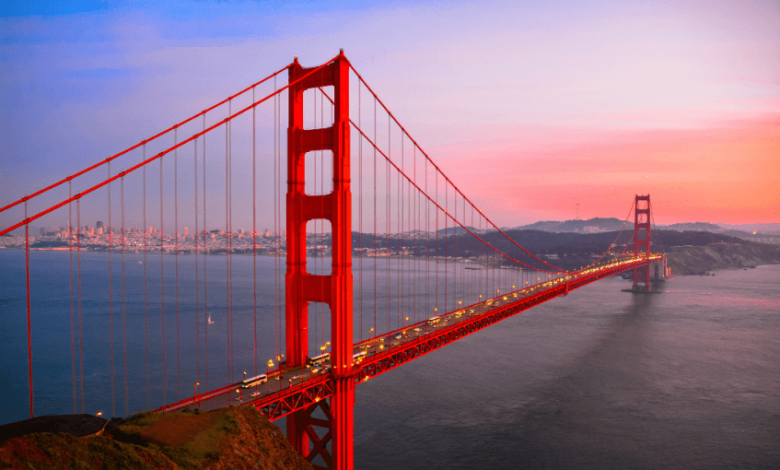
Images of San Francisco are often used on websites to portray the city in a positive light. Here are some popular images of San Francisco:
-Aerial View of San Francisco from Mount Tamalpais
-Golden Gate Bridge from Marin Headlands
-San Francisco at Night from the Bay Bridge
-Sunset over the Bay from Golden Gate Park
How to use a 329 San Francisco image for your website
How to use a 329 San Francisco image for your website
If you’re looking for a stylish and high-quality image to represent your business or organization, look no further than the 329 San Francisco images onxp. These crisp, clean images are perfect for use on any site – be it a personal blog, an online store, or even a corporate website.
To get started, simply browse our extensive selection and select the image you want to use. Once you’ve selected your desired image, click on the “Download” button to download it in either JPG or PNG format. Next, follow the simple steps below to embed the image on your website:
1) Embed the image using an HTML code snippet:
2) Add the following meta information to your website’s header:
3) Add the following line of code to your web page’s footer:
Now you’re ready to start displaying some fabulous 329 San Francisco images on your site!
How to create a 329 San Francisco image for your business
If you’re looking to spruce up your website with a cool 329 San Francisco image, here are some tips on how to do it! Whether you want a cityscape, skyline or any other type of image, here are some basics to follow:
1. Choose an appropriate photo. Make sure the photo is high-quality and relevant to your business.
2. Size it up. Always take into account the size of your image when selecting it – make sure it fits well within your website’s width and height constraints.
3. Add text and graphics. Once you’ve selected the right photo, add text or graphics around it to give your site a polished look.
4. Test out the design before going live. Once you’re happy with the overall look of your 329 San Francisco image, test it out by adding it to a staging page or blog post for feedback.
How to Convert a JPEG to a San Francisco Image
How to Convert a JPEG to a San Francisco Image
If you would like to create an image for your web site that features the stunning cityscape of San Francisco, there are several ways to go about it. You can use an online tool, such as Pixlr or GIMP, or you can use a more traditional photo software package, like Adobe Photoshop. Here’s how to convert a JPEG file into a San Francisco image using each method:
Online Tools
If you’re using an online tool, like Pixlr or GIMP, the first thing you’ll need is the photo file itself. Open the file in either program and click on the tools tab. From here, you’ll want to select the Borders and Shapes tool and start adding borders around the entire image. This will give your image some structure and help it look more professional. Next, add some highlights and shadow effects using the Highlights and Shadows tool. Finally, add some simple text or graphics to finish off your picture.
Photo Software Packages
If you’re using a photo software package like Adobe Photoshop, open your JPEG file in Photoshop and click on File > Import >JPEG Files… You’ll be asked where to locate your photo file. Navigate to where you saved it on your computer and select it from the list of files. Next, click on OK to import it into Photoshop. From here, you’ll want to select the Image > Mode menu option and
How to Use an IMG Tags for a San Francisco Image
To use an IMG tag for a San Francisco image, follow these steps:
1. Open the image in a photo editing software like Photoshop or GIMP.
2. Save the image as a JPG or PNG file.
3. Open the file in your web browser and search for “img tag” in the address bar.
4. Copy and paste the IMG tag code into the address bar of your web browser, replacing “http://www.sanfranciscoimages.com/city-photos/” with the URL of your San Francisco photo blog post’s homepage (for example, http://www.sanfranciscoimages.com/city-photos/).
5. Click “Submit.”
Conclusion
Images can be one of the most important components of your website. They can help to attract and engage with customers, show them what you offer, and make it easy for them to find what they are looking for. With so much information available on the internet these days, making sure that your images are up to date, professional-looking, and easy to navigate is crucial if you want people to stick around long enough for you to actually sell them anything!